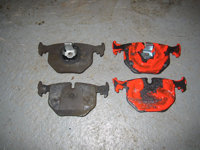
So the warning light flashed up on the dash that meant it was time for new rear pads at ~85,000 miles. I had previously changed the rear pads at approx 50k miles, with Textar ones from GSF. My discs were looking past their best as well, being the original discs, having lasted 85k miles!
I had thought of getting official BMW drilled discs at £80 a piece from BMminiparts , but when i saw Brembo rear discs at £65 for the pair incl P&P on ebay, I thought I'd save myself some cash. And anyway I've already got front grooved discs so, rear drilled discs would look a little odd. I also again got Textar pads (OEM supplier) this time from Eurocarparts for about £20.
 The DIY was going well, got the rear left pad & disc done in about an hour, but the rear right was real PITA!! It took over an hour just to get the disc off, which was rusted on and stuck to the cruddy looking handbrake mechanism behind it (see pic to left). In the end i got it off, but in doing so with some needle nose pliers, the handbrake was a little loose after...... no biggie the car was going in for an Oil Service at Crossflags BMW and they readjusted the handbrake at minimal cost.
Hints & Tips
- If you change discs & pads at the same time, they can squeal a for a little while, as they bed in. Mines did, nothing major, just a slight squeal at very low speeds and so I applied some more copper grease to the relevant areas. That only reduced the squeal slightly, but as the discs & pads bedded in over teh following weeks, the squeal has disappeared completlety.
- One tip i learnt from the 1st time i did the rear pads was not to bother with aftermarket "pad wear sensors" from the likes of GSF/Eurocarparts, because the sockets on them are a terrible fit requiring electrical insulation tape to keep them fitted snugly. Instead I ordered original rear brake pad wear sensors from BMminiparts, cheaper than at the dealers, albeit a little more than the el cheapo's from the likes of GSF.
- A rubber mallet will help get your old wheels off if they've rusted on!
- The gap behind the caliper retaining bolts is fairly tight, and when torqueing those bolts back up a 1/4" torque wrench will slip in behind for BOTH bolts & makes the job much easier. Whereas a 1/2" torque wrench will only be able to access the lower of the 2 retaining bolts.
- Also make sure you have plenty of brake cleaner, nothing worse than getting half way through this job and then running out of the stuff. Make sure you clean off all the dirt and crap off guide bolts, the caliper piston etc A wire/stiff brush is handy.
- I used a drill with a rotary wire wheel brush to clean up the hub faces, before applying copper grease to them. Also did the same to the backs of the alloys/rims themselves.
- Use plenty of copper grease (works just as well as anti squeal paste) on the backs of the pads, pic below is from M3 Madrussians website (with excellent DIY write up), of where to apply the grease to the pads. Below is also my pic of the copper grease used on the hub face also, so that the back of the wheel doesnt rust and get stuck on to the hub, hence comes off more easily the next time you wanna remove your wheels.